
If you’ve ever walked a site and wondered why the ceilings feel lower, the answer is often plumbing. Waste lines need slope. Vents need clear vertical runs. Domestic hot and cold water risers fight for the same shafts as electrical and HVAC. In other words: plumbing drawings and riser diagrams quietly govern spatial decisions long before steel is erected. In a Building Information Modeling (BIM) world, getting plumbing right, early, saves schedule, prevents rework, and protects budget.
This article breaks down how modern teams use plumbing BIM modeling services to produce dependable drawings, constructible riser diagrams, and shop-ready deliverables. We’ll cover practical workflows, where clashes really come from, and the tradeoffs you’ll weigh to deliver on time without compromising quality.
Why Plumbing Deserves a Front-Row Seat in BIM
Architects often lead with plan geometry, but plumbing introduces non-negotiables: gravity, slopes, traps, cleanouts, vent terminations, and backflow prevention. A beautiful ceiling plan won’t survive a 4-inch sanitary line that needs 1/4″ per foot fall across a congested corridor.
BIM lets us model these physical truths from day one, instead of discovering them in the field. Good plumbing models become sources of truth for:
- Coordination: Automatic clash checks against structure, ductwork, cable trays, fire protection, and elevator/shaft framing.
- Constructability: Realistic slopes, swing space for cleanouts and valves, maintenance clearances, and access panels that inspectors will actually approve.
- Quantity & Cost: Reliable fixture counts, pipe lengths, fitting takeoffs, and valve schedules for early budgeting.
- Compliance: Geometry aligned to the AHJ and applicable codes (IPC/UPC), plus manufacturer-install constraints.
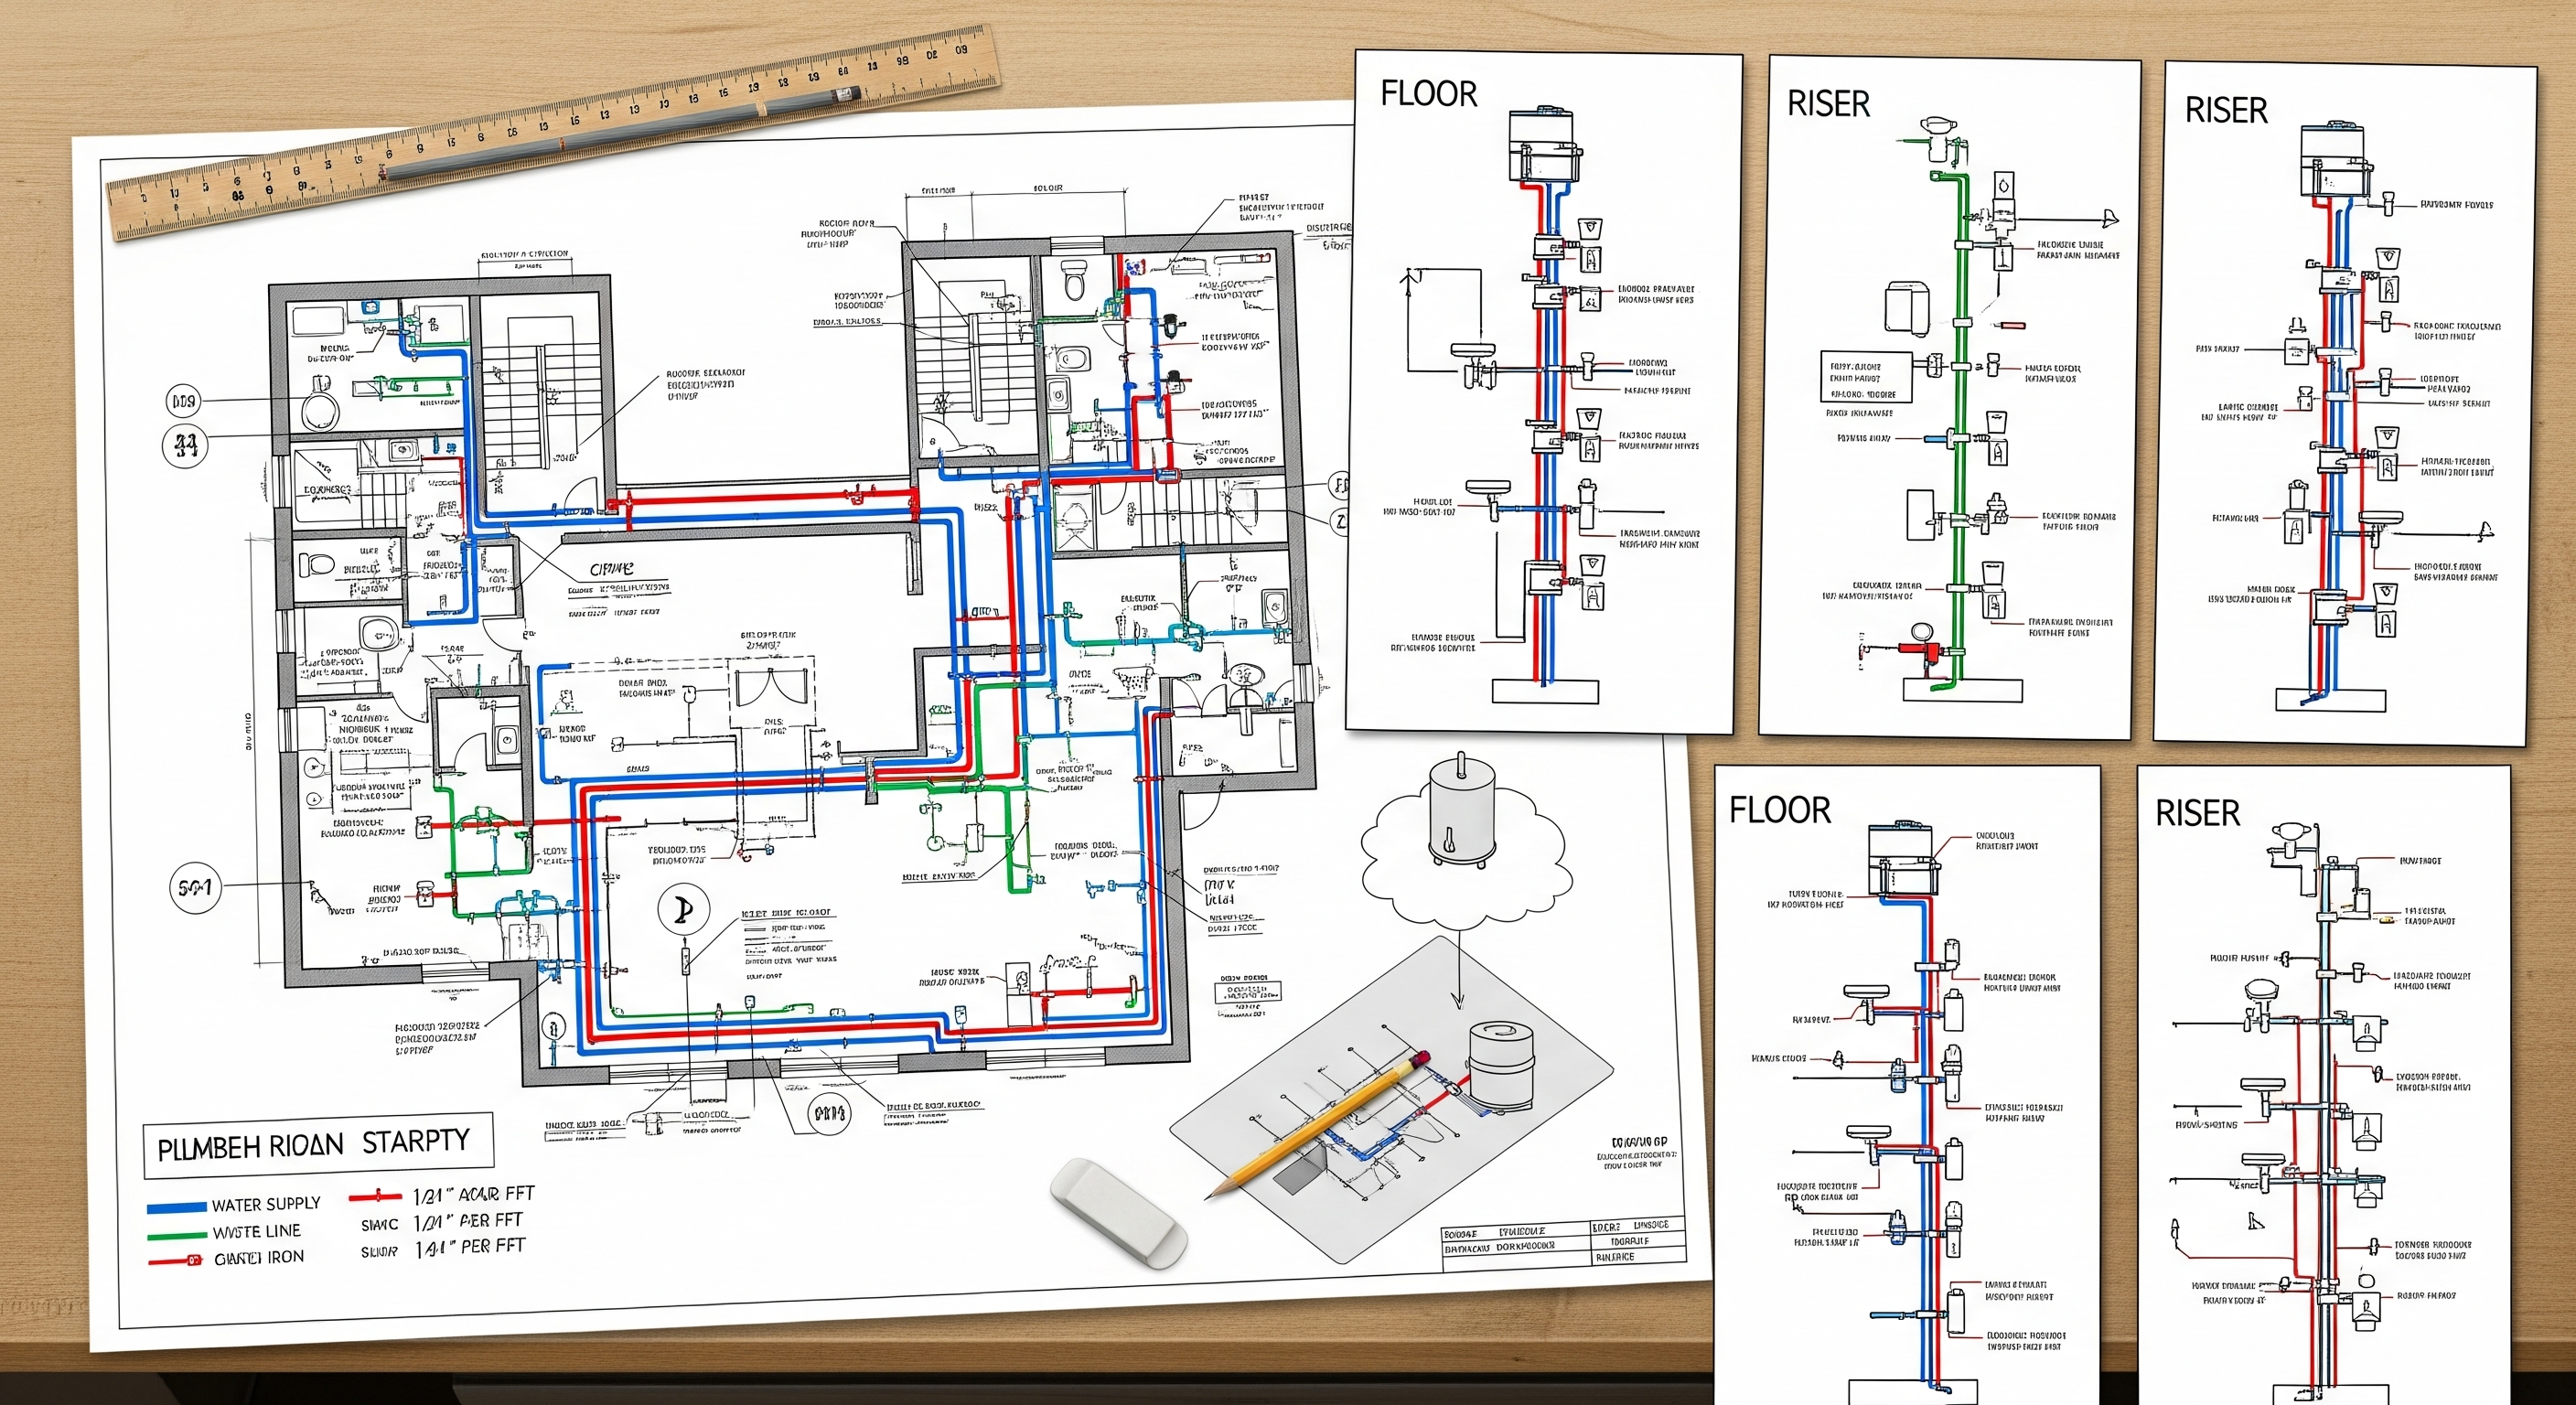
The Two Anchors: Plumbing Drawings and Riser Diagrams
What goes into plumbing drawings?
- Plans: Domestic water (cold/hot/recirc), sanitary, vent, and storm systems.
- Sections & details: Sleeves, floor penetrations, trap primers, cleanouts, and insulation details.
- Schedules: Fixtures, valves, water heaters, pumps, backflow preventers, and specialties.
- Notes & legends: Pipe materials, slopes, identification, and testing requirements.
What makes riser diagrams “the hidden backbone”?
Riser diagrams show how vertical systems connect floor to floor. They demystify which stack serves which fixtures, how branches tie in, where pressure-reducing valves (PRVs) and recirculation loops live, and how vents terminate above the roof. A well-authored riser:
- Clarifies system sequence (meter → backflow → booster/PRV → distribution).
- Reveals critical elevations (invert levels, pipe crowns, and top-of-pipe clearances).
- Drives material lists and valve tagging that roll right into a shop drawing and procurement workflow.
- Prevents “mystery tees” in the field that cause inspections to fail.
From Concept to Constructible: A BIM-First Workflow
1) Schematic Design: Put the “big rocks” in first
- Core decisions: Shaft locations, wet-wall stacking, water heater plant (central vs point-of-use), rain leader paths, and floor drains.
- Why now? Plumbing needs vertical continuity. Early alignment prevents later compromises like lowered ceilings or last-minute soffits.
2) Design Development: Add intelligence, not just detail
- Establish system types with correct families and parameters (pipe material, insulation, service type, slope rules).
- Set fixture units and demand loads to size mains and risers realistically, not just “placeholder sizes.”
- Begin model-based 3D clash services against structure and MEP. Catch beam conflicts, elevator pit drains, and garage oil-water separators now, not during submittals.
3) Construction Documents: Lock clarity and consistency
- Standardize view templates, sheet sets, symbols, and tags.
- Produce plan views, sections, and riser diagrams tied directly to the model.
- Build valve schedules, equipment schedules, and specialty lists that downstream fabricators can trust.
4) Fabrication & Field: From model to shop-ready deliverables
- Generate coordinated shop drawing packages and release spool sheets for prefabrication where practical.
- Use issue tracking to close clashes and document late design changes without losing model fidelity.
- Capture redlines into a clean record model for turnover.
Where Clashes Really Come From (and How to Avoid Them)
1) Gravity vs structure. Sanitary/storm slopes intersect beams at inopportune spots. Remedy: set beam penetrations early with structural; model slopes from the start rather than “assume level and add later.”
2) Vent stacks vs fire risers vs cable trays. Shafts are finite. Remedy: allocate shaft “real estate” with explicit system zones; reflect that zoning in the riser diagram and in 3D.
3) Cleanout and valve access. Doors, millwork, or casework block required access. Remedy: embed access-zone clearances into families; flag violations in coordination views.
4) Equipment service clearances. Water heaters, PRVs, and booster pumps need working space. Remedy: model manufacturer clearances and protect them using clash rules and “no-go” volumes.
5) Ceiling height pressure. Sanitary lines eat plenum space. Remedy: coordinate ceiling heights with the architect after realistic pipe sizing and slopes are in place.
The Tradeoffs You’ll Need to Balance
- Model detail vs performance: Highly detailed fittings look nice but can slow a federated model. Decide where detail pays off (e.g., pump skids) and where symbolic is enough (e.g., standard elbows).
- Fabrication readiness vs design agility: Spool-level modeling accelerates prefabrication but reduces flexibility. Lock it when design risk is low; keep it schematic when the layout is still fluid.
- Centralized vs distributed domestic hot water: Central plants simplify maintenance but can complicate recirculation and balancing. Distributed heaters improve response time but multiply service points.
- Shaft count vs usable floor area: Extra shafts ease riser congestion but can squeeze tenant layouts. Decide with the landlord’s test fit in mind.
- Material choice: Copper vs PEX vs PVC/CPVC vs cast iron carries cost, acoustic, fire-rating, and joinery implications that must align with code and building performance goals.
From BIM to Shop: Deliverables That Field Crews Trust
Great models earn their keep when they translate into clean, unambiguous field documents. A robust plumbing package typically includes:
- Plan views with real slopes, invert elevations at critical points, and clear tagging.
- Riser diagrams that match floor-by-floor reality—labels, sizes, valve IDs, backflow devices, PRVs, recirculation loops, and vent terminations.
- Schedules for fixtures, valves, equipment, hangers, and insulation.
- Annotated details for sleeves, firestopping, trap primers, and roof penetrations.
- Bill of materials (BOM) attributable by zone or floor to support phased buyouts.
- Shop drawing sets and spool drawings tied to the model’s coordinates for layout and prefabrication.
This is where professional plumbing BIM modeling services shine: standardizing families and parameters, enforcing naming conventions, and ensuring every sheet is consistent—so foremen don’t have to guess.
Quality Control: Model Health and Drawing Accuracy
A few discipline habits keep plumbing models accurate and nimble:
- Slope-aware routing rules: Encode default slopes per system so “flat pipes” don’t sneak in.
- Worksets and filters: Keep visibility responsive; isolate domestic vs sanitary vs storm quickly.
- Warning triage: Fix “not parallel,” disconnected elements, and duplicate marks before they snowball.
- Dimension to reality: Control-check critical dimensions (invert to slab, top-of-pipe to ceiling) against architectural and structural.
- Revision hygiene: Cloud and tag changes; maintain sheet issue logs that match the federated model state.
Cost, Schedule, and Operations: The Impact of Getting Plumbing Right
- Cost: Early, accurate fixture counts and pipe lengths provide reliable budgets. BOMs tied to areas let you sequence purchase orders and hedge price volatility.
- Schedule: Fewer RFIs and faster inspections when risers and vents are clear, cleanouts are accessible, and sleeves line up. Prefab spools compress onsite durations.
- Operations: Thoughtful valve placement and clear labeling pay dividends for decades. The record model helps facilities teams isolate issues fast, plan shutdowns, and integrate with CMMS.
- Risk: Code compliance and inspectability reduce rework. Consistent slope and venting design helps avoid chronic odor or backup problems that become reputation killers.
When making decisions like material choices, riser stack locations, or water-heater strategies, consider their impacts across cost, schedule, and long-term maintainability, not just first cost.
Real-World Patterns by Building Type
- Hospitals & labs: High fixture densities, specialty gases, and strict infection-control demand careful chase planning and redundancy in risers. Cleanouts and access panels must be coordinated with clinical workflows.
- High-rise multifamily: Domestic booster sets, PRVs by zone, and vertical waste stacks dominate. Sound attenuation and fixture venting are crucial for tenant experience.
- Education: Renovations often require threading new pipes through legacy structure. Early scanning and phased riser cutovers protect school schedules.
- Data centers & industrial: Process drains, oil-water separators, and trench systems add life-safety and environmental angles, details the AHJ will scrutinize.
How Professional Services Reduce Rework
Engaging experienced plumbing BIM modeling services keeps your team focused on design intent while we handle:
- Template and family governance so every valve, fitting, and fixture carries the right parameters.
- Rule-based clash checks that separate real conflicts (e.g., pipe crown through a beam) from noise.
- Riser logic and documentation that downstream trades and inspectors actually understand.
- Shop drawing authoring and spool mapping aligned to construction sequencing.
- Closeout modeling that converts field redlines into reliable as-builts for turnover.
Bottom Line
Plumbing doesn’t shout for attention but it quietly dictates whether a building is buildable, inspectable, and maintainable. By pairing disciplined modeling with clear plumbing drawings and riser diagrams, you turn invisible constraints into visible, solvable decisions. That’s how you cut RFIs, pass inspections the first time, and protect profit.
If you’re ready to make plumbing a competitive advantage, bring in specialized plumbing BIM modeling services to standardize content, run targeted 3D clash services, and produce shop-ready documentation. From concept to shop drawing to as-builts, the right partner turns plumbing into the backbone it was always meant to be.
Frequently Asked Questions
1) What’s the difference between plumbing plans and riser diagrams?
Plans show horizontal distribution on each floor; riser diagrams explain vertical connectivity and system logic—how floors tie into stacks, where PRVs live, and how vents terminate. Field teams need both.
2) How early should we start clash detection for plumbing?
Run 3D clash services in Design Development, not just before CDs. Gravity systems and shafts lock space early; catching conflicts then prevents costly ceiling and soffit changes later.
3) Can BIM speed up shop drawings and prefabrication?
Yes. A well-structured model with stable parameters lets you auto-generate a shop drawing baseline and drive spool sheets. That accelerates submittals and shortens onsite durations.
4) How do riser decisions affect cost?
Stack placement determines shaft count, pipe lengths, and pressure zones. Smart riser strategies reduce booster sizes, PRV counts, and wasted floor area—saving both capex and opex.
5) What’s the biggest cause of plumbing rework?
Late realization of slope and access needs. Model slopes from day one, protect maintenance clearances, and document them clearly on drawings and risers.